We Got Steam Heat

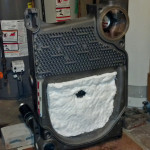
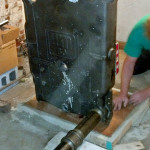
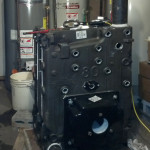
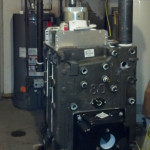
The brownstone building needed a new steam boiler to replace the scary, leaky old one. After calculating the connected load of pipes and radiators, we selected a commercial type boiler with large sections that could accommodate a large pipe diameter header. We disconnected the old number and waved as it went out the door, to be recycled. Our multi-talented and -muscled demo team brought the heavy new boiler sections into the building and set them out of the way for us at the same time.

1.IMG_20141104_113520_241
2.IMG_20141104_113714_342
3.IMG_20141104_15454.04_145
4.IMG_20141105_134354_756
5.IMG_20141106_175724_708

Once the old beast was gone, we cleaned the floor and poured a level cement pad for the new boiler. Here’s the rear section, the first to be installed, looking like it’s ready for a shave. We’ve prepped it with the refractory target material which deflects the flame from the burner. Each section in a steam boiler is like a slice in a loaf of bread. You can see the white area of the fire box, then the textured area above. Those pins add surface area for the hot gas from the fire to exchange its heat with the boiler water on the inside of the section. There is a large area for steam to form in this boiler (see the big circle on the upper right of the section), which is important for good operation.

These sections weigh over 300 lbs. each. The pipe nipple is supporting the rear section and holding it plumb so when we add sections, the whole assembly will be plumb and level.

Now we have all three sections assembled, the burner door on and the first piece of our 4 inch pipe header. Just before this, we had plugged each outlet in the entire assembly, filled the boiler with water and pressure tested it to assure all seams were tight.

The piping header above the boiler is complete, with swing joints to allow expansion and contraction to take place in the piping, not between the sections. The equalizing line is sized properly and is heading down to connect to the return tapping in the rear after it picks up the return lines. One of the 2 inch take-offs is already connected to the existing piping. We’ve used a 45 degree angle to connect to the big header so that any condensate dropping back down that connection will slide underneath the fresh, dry steam and not quench it. The vent canopy which collects the combustion gases, sets their pressure so the burner can work properly, and starts them on their way to the chimney is in place.

Kevin is connecting the water feed to the boiler through the combination low water cut off and feeder. After that, he’ll connect the pipes which use boiler condensate to heat the basement apartment. Jenn is attaching the gas burner. Controls and safeties are in place, waiting to be wired. Good thing we’re almost done, it is getting cold outside.

We also provided additional combustion air to the small boiler room. Once everything was wired, the burner fired and the building got nice, even, steam heat.